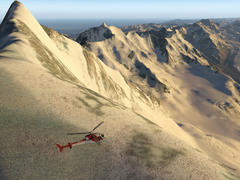
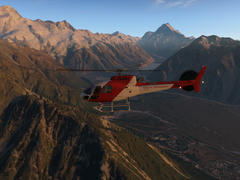
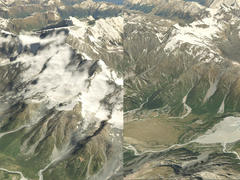
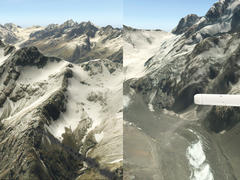
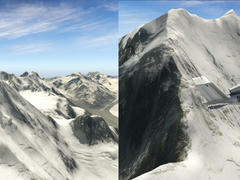
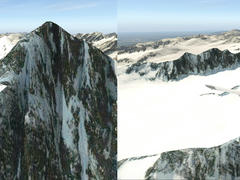
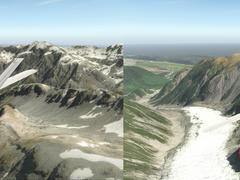
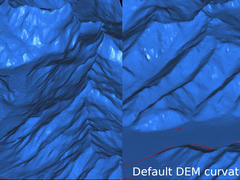
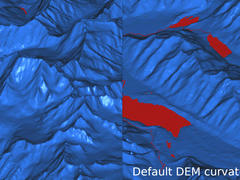
This article outlines the process I've developed for creating highly detailed mesh scenery of New Zealand's Southern Alps for the X-Plane Flight Simulator, using the best freely available digital elevation data.
1. Obtain DEM Data
Get DEM data from https://koordinates.com/publisher/university-of-otago-national-school-of-surveying/data/
The data avilable here is 15m DEM of New Zealand.
2. Merge DEM into single file
Convert TIF files into a single vrt file https://gis.stackexchange.com/questions/48910/avoiding-reprojection-gaps-when-merging-dem-rasters Please pay attention to rendering artifacts, these can be verified using hill shading.
gdaldem hillshade input.tif.vrt output.png
gdal_translate -scale input.tif.vrt output.png
I put all the tif dem files into one folder and then created them using:
gdalbuildvrt -r cubic tile.tif.vrt *.tif
Unfortunately this was producing artifacts. https://gis.stackexchange.com/questions/119057/merging-dem-rasters has some answers. I can use a different sampling method mentioned on: https://www.gdal.org/gdalbuildvrt.html and this solves the issue of squares appearing in the middle, but there are still artifacts along the boundaries between the tifs.
Eventually I found out about the gdal_fillnodata.py script. This only
operates on tif files, not the vrt. Initially it didn't work because the
values used for the edges were -nan but the values for no data were -inf,
which meant that the fillnodata script was only operating on the original
-inf null data values and not the newly created gaps.
I edited the vrt file to change what the NoDataValue is from -inf to
-nan:
  <GeoTransform>  1.6861088038099999e+02,  1.5699496274303981e-04,  0.0000000000000000e+00, -4.1465068702600000e+01,  0.0000000000000000e+00, -1.5699496271755233e-04</GeoTransform>
  <VRTRasterBand dataType="Float32" band="1">
    <NoDataValue>-inf</NoDataValue>
    <ColorInterp>Gray</ColorInterp>
    <ComplexSource resampling="cubic">
      <SourceFilename relativeToVRT="1">17-greymouth-15m-dem-nzsosdem-v10.tif</SourceFilename>
Got changed to:
  <GeoTransform>  1.6861088038099999e+02,  1.5699496274303981e-04,  0.0000000000000000e+00, -4.1465068702600000e+01,  0.0000000000000000e+00, -1.5699496271755233e-04</GeoTransform>
  <VRTRasterBand dataType="Float32" band="1">
    <NoDataValue>-nan</NoDataValue>
    <ColorInterp>Gray</ColorInterp>
    <ComplexSource resampling="cubic">
      <SourceFilename relativeToVRT="1">17-greymouth-15m-dem-nzsosdem-v10.tif</SourceFilename>
Now I can render out as a tif to use in the fillnodata:
gdal_translate tile.tif.vrt tile.tif
gdal_fillnodata.py -md 10 tile.tif tile_filled.tif
And then convert the -nan value to 0.0 so that Ortho4XP can deal with the
file (it complains about NaNs):
gdal_calc.py -A tile_filled.tif --outfile=tile_filled_zeroed.tif --calc="nan_to_num(A)"
Finally this results in a good quality tile_filled_zeroed.tif file to use with Ortho4XP.
3. Create Scenery with Ortho4XP
If you've already created a tile you'll need to re-run the first two steps,
first having set the custom dem data file to the final tif from the previous
step. I like the curvature_tol setting to be 1.0 for this data set, it
seems like a good compromise between quality, and number of triangles,
resulting in around 3.5 million on a mountainous land mass. I've also only
currently got 15gb of ram which dies with many more than this.
4. Preview Output
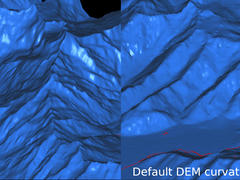
The medit tool available here is great for previewing the output mesh without having to load up x-plane, this saves a lot of time!
5. Comparison
Default Ortho4XP DEM (probably from http://viewfinderpanoramas.org/), with
curvature_tol=2.0, 1.5M triangles:
Default Ortho4XP DEM with curvature_tol=1.0, 4M triangles:
Default Ortho4XP DEM with curvature_tol=0.5, 12M triangles:
Custom DEM curvature_tol=1.0, 3.5M triangles:
Custom DEM curvature_tol=0.5, 10.3M triangles:
Default 2.0 Using 5.1GB RAM 5.3GB VRAM 70FPS Custom 0.5 Using 6.3GB RAM 4GB VRAM 50-70FPS
